Abstract: A Sandwich Maker sounds simple—close the lid, wait, eat—but most frustrations happen in the details: uneven browning, soggy bread, cheese lava on the counter, and appliances that are bulky or hard to clean. This guide breaks down the real pain points people face and shows you how to choose (and use) a sandwich maker that fits your kitchen, your schedule, and your sandwiches. You’ll get a practical checklist, a comparison table, best-practice cooking tips, cleaning routines, and an FAQ friendly structure and an emphasis on trustworthy, experience-based guidance.
Table of Contents
Outline
- Identify the problems you actually want solved (speed, cleanup, texture, safety, storage).
- Pick the right format (sealed pocket, grill press, multi-plate, breakfast-style).
- Use a no-fluff checklist to avoid common “why did I buy this” moments.
- Follow practical cooking and cleaning habits that extend appliance life.
- For buyers and brands: ask the right questions about specs, consistency, and documentation.
The Real Pain Points a Sandwich Maker Should Solve
When people say they “need a Sandwich Maker,” they’re rarely just shopping for a hot plate. They’re trying to fix a routine problem: rushed mornings messy lunches inconsistent texture tiny kitchens picky eaters
Most common frustrations (and what to look for):
- Uneven browning → steady heat, good plate contact, and a hinge that adapts to thickness.
- Soggy bread → enough heat to drive off moisture, plus better ingredient layering.
- Cheese leakage → plate design, edge control, and right fill amounts.
- Hard-to-clean plates → quality nonstick surfaces and smart cleanup steps.
- Bulky storage → compact footprint, cord storage, or vertical storage capability.
- Safety worries → cool-touch handle, stable feet, and clear indicator lights.
A good Sandwich Maker should feel like it removes friction from your day—less time hovering over a pan, fewer dishes, and more consistent “that’s exactly what I wanted” sandwiches.
Sandwich Maker Types and Who They’re For
Not all sandwich makers behave the same. Picking the wrong type is the fastest path to disappointment—especially if your bread, fillings, or schedule don’t match the design.
1) Sealed Pocket Sandwich Makers
- Best for: classic triangle “toastie” pockets, quick snacks, controlled fillings.
- Why people love them: edges seal, so fillings stay put and kids can eat without chaos.
- Watch-outs: thick artisan bread may not fit; overfilling leads to blowouts.
2) Grill Press / Panini-Style Makers
- Best for: paninis, melts, wraps, and “anything that needs a press.”
- Why people love them: flexible thickness; great for crisp surfaces and grill lines.
- Watch-outs: cheese can drip; you’ll want a drip tray habit or parchment trick.
3) Multi-Plate (Interchangeable Plate) Models
- Best for: households that want one appliance for sandwiches, waffles, and snacks.
- Why people love them: versatility without buying three separate devices.
- Watch-outs: more parts to store; plate swaps are only worth it if you’ll use them.
4) Breakfast Sandwich Makers
- Best for: egg + cheese + bread stacks in the morning.
- Why people love them: routine-friendly, portion-controlled breakfast.
- Watch-outs: narrower use case; less flexible for big lunch sandwiches.
Buyer Checklist That Prevents Regret
Here’s the simplest way to choose a Sandwich Maker: decide your “non-negotiables” first, then validate the details that protect you from daily annoyances.
Step 1: Define your use in one sentence
- “I need fast breakfast toasties with minimal mess.”
- “I want café-style paninis at home without a stovetop.”
- “I’m buying for a small office pantry and it must be easy to clean.”
Step 2: Check these 10 practical points
- Plate style: sealed pockets vs grill ribs (pick based on your favorite sandwich).
- Hinge flexibility: can it handle thin toast and thicker sandwiches without crushing?
- Heating consistency: steady heat matters more than “maximum wattage” marketing.
- Nonstick quality: it should release easily without aggressive scraping.
- Indicator lights: preheat/ready signals reduce guesswork and burning.
- Handle comfort: you’ll press it down repeatedly—make that painless.
- Footprint & storage: measure your counter and cabinet before you fall in love.
- Cleanup path: can you wipe it in under 60 seconds after cooking?
- Smell control: good heat helps; your ingredient choices help more (we’ll cover that).
- Support and supply: warranty terms, spare parts, and after-sales responsiveness.
Comparison Table of Key Features
Use this table to match features to real-life needs. It’s not about “best overall”—it’s about the best fit for your habits.
| Feature | Why it matters | Who should prioritize it | Simple test at home |
|---|---|---|---|
| Sealing edges (pocket style) | Reduces spills and keeps fillings contained | Families, kids’ snacks, quick bites | Can you fill modestly and still get a clean edge? |
| Floating hinge / adjustable height | Improves contact for thick or thin sandwiches | Panini lovers, artisan bread users | Does it press evenly without crushing the center? |
| Nonstick release | Determines whether cleanup is pleasant or miserable | Everyone, especially frequent users | Does melted cheese peel off with a wipe (when warm)? |
| Grease or crumb control | Keeps counters clean and reduces smoke/smell | Small apartments, office pantries | After cooking, do you see a manageable cleanup zone? |
| Storage-friendly design | Makes the appliance usable long-term (not “cabinet guilt”) | Tiny kitchens, dorms | Can it store upright and stay stable? |
How to Get Crisp, Even Results Every Time
Here’s the part most product pages don’t teach you: technique is half the outcome. A Sandwich Maker can be excellent, but ingredient order and moisture control decide whether you get crispy perfection or warm disappointment.
The “No-Soggy” sandwich build
- Toast shield: Put cheese or a fat-based spread (butter/mayo) against the bread to protect it from wet ingredients.
- Dry layer: Use drier proteins (ham, turkey, cooked chicken) or squeeze moisture from tomatoes/pickles with a paper towel.
- Wet in the middle: Sauces go between fillings, not directly on bread.
- Don’t overfill: Your sandwich should close with mild resistance, not a fight.
Timing tips that stop burning
- Always preheat: Starting cold increases sticking and uneven browning.
- Use “peek discipline”: Opening repeatedly dumps heat and invites sogginess.
- Let it rest 60 seconds: Steam redistributes; the crust firms up instead of tearing.
Three reliable sandwich formulas
- Classic melt: cheddar + sliced turkey + thin onion + light mustard (mustard in the middle).
- Veggie crunch: mozzarella + roasted peppers (patted dry) + spinach + pesto.
- Sweet-savory: brie + apple slices + a tiny drizzle of honey (center layer).
Practical note: If you’re using a grill press style, a small sheet of parchment can reduce cheese drip and cleanup without hurting browning.
Cleaning and Maintenance That Takes Minutes
The 90-second wipe-down routine
- Unplug and cool briefly: warm is easier to clean than cold, but don’t burn yourself.
- Dry wipe first: remove crumbs and cheese bits with a paper towel or soft cloth.
- Damp wipe second: use a slightly damp cloth to lift oils (avoid dripping water into seams).
- Dry finish: one more dry wipe prevents residue and smell buildup.
Weekly maintenance checklist
- Check hinge area for crumbs or oil buildup.
- Inspect cord and plug for wear.
- Wipe outer shell and handle where oils collect.
- Avoid metal tools—use silicone or wood to protect nonstick surfaces.
If your sandwich maker has removable plates, cleaning becomes even simpler—just follow the manufacturer’s washing guidance to protect coatings.
If You’re Sourcing for Retail or Projects
If you’re not just buying one unit—but evaluating models for resale, branding, or bulk purchase—your questions should go beyond appearance.
What to request from a manufacturer
- Clear specifications: power rating, plate material, dimensions, and packaging details.
- Consistency checks: how they verify heating stability and surface performance.
- Materials transparency: ask what touches food and how coatings are maintained batch-to-batch.
- Compliance documentation: request the documents relevant to your target market and channel.
- After-sales plan: warranty terms, spare parts, and response process.
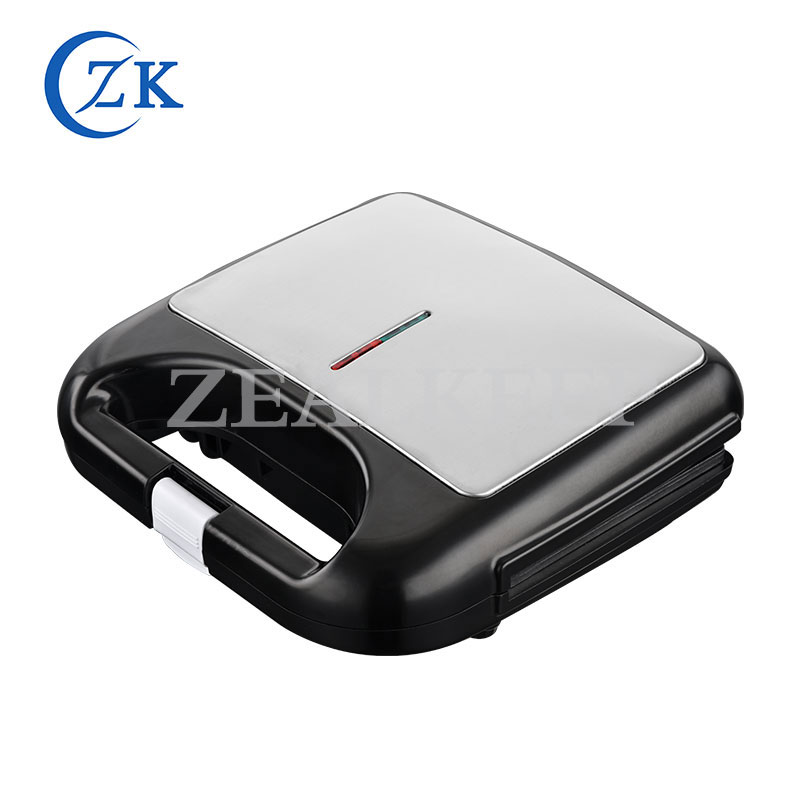
Ningbo Zealkeep Electrical Appliance Co.,Ltd. offers sandwich maker products for buyers who want a dedicated small-appliance supplier in the category. If you’re comparing options, treat the conversation like a professional audit: ask for the spec sheet, confirm how they ensure heating consistency, and align product configuration to your audience (sealed pockets for families, grill press styles for café-like paninis, multi-plate models for “one appliance does more” positioning).
A simple positioning tip: Don’t sell a sandwich maker as “just faster.” Sell it as predictable: predictable crunch, predictable cleanup time, predictable portioning. That’s what keeps customers satisfied.
FAQ
How do I stop my sandwich from turning soggy in a sandwich maker?
Preheat fully, keep wet ingredients away from bread, and use a “barrier layer” like cheese or a fat-based spread on the bread first. Pat tomatoes/pickles dry and avoid overfilling so steam can escape without soaking the crumb.
Is a sandwich maker only for bread sandwiches?
Not at all. Many people use a Sandwich Maker for wraps, quesadillas, stuffed flatbreads, and even reheating pizza slices (grill press style works especially well). Just keep fillings controlled and use parchment if drips are likely.
Why does cheese leak out and burn on the plates?
Usually it’s overfilling or placing cheese too close to the edge. Keep cheese slightly “inset” from the crust, use thinner slices, and don’t press down aggressively—let the heat do the work.
What’s the safest way to clean a nonstick sandwich maker?
Unplug first, wipe while the plates are warm (not hot), and use soft cloths or silicone tools only. Avoid metal utensils and harsh abrasives—those shorten nonstick life fast.
How do I choose between a sealed pocket model and a grill press model?
Choose sealed pockets if you want tidy, contained toasties and kid-friendly snacks. Choose a grill press if you want flexible thickness, panini-style texture, and more variety (wraps, melts, layered sandwiches).
Final Thoughts
The best Sandwich Maker is the one you’ll actually use: it fits your counter, matches your favorite sandwiches, and cleans up fast enough that you don’t dread it. Use the checklist above, focus on the pain points that matter in your day-to-day life, and you’ll end up with an appliance that earns its spot in your kitchen.
Ready to Compare or Source a Sandwich Maker?
If you’re evaluating models, planning a bulk purchase, or exploring private-label options with Ningbo Zealkeep Electrical Appliance Co.,Ltd., bring your target market and must-have features—and we’ll help you map them to a practical configuration. For product details, customization discussions, or quotations, contact us and tell us what kind of sandwiches your customers actually want to eat.